Aeg LAVAMAT 88730 User Manual
Browse online or download User Manual for Washers Aeg LAVAMAT 88730. AEG LAVAMAT 88730 User Manual
- Page / 56
- Table of contents
- BOOKMARKS
- ÖKO-LAVAMAT 88730 update 1
- Dear Customer 2
- Contents 3
- Child Safety 7
- General Safety 7
- Disposal 8
- Environmental tips 8
- Description of the Appliance 9
- Control panel 10
- Programme selector 10
- Operating Instructions 11
- Programme option buttons 12
- Run time display 13
- What does UPDATE mean? 14
- Before the first wash 15
- Preparing a Wash Load 15
- Detergents and Conditioners 17
- Water softening 17
- Running a washing cycle 18
- Setting the Washing Programme 19
- Delay timer 20
- Soaking duration 20
- Opening and closing the door 21
- Load the washing 21
- Add detergent / conditioner 22
- Start the washing programme 23
- Washing Programme Progress 24
- Programme tables 26
- Separate spin 27
- Maintenance and Cleaning 28
- Washing Machine Drum 29
- Main door 29
- Cleaning the drain pump 30
- What to do if 31
- (2 appears 33
- Water Cooling 38
- Programme protection 39
- Child Safety Feature 40
- Installation of the appliance 42
- Installation-Site preparation 44
- Levelling the appliance 45
- Electrical Connection 46
- Permanent Connection 47
- Water connection 48
- Inlet Hose Connection 49
- Water Drainage 50
- Pump head of greater than 1m 51
- Technical data 52
- Dimensions 52
- Warranty conditions 53
- Service & Spare Parts 55
Summary of Contents
ÖKO-LAVAMAT 88730 updateThe environmentally friendly washing machineUser information
Operating Instructions10Control panelProgramme selectorThe programme selector defines the nature of the washing cycle (e.g. water level, drum move-men
Operating Instructions11EASY IRON position: Main washing cycle at 40 °C for easy-care fabrics which, with the aid of this programme, only require a ge
Operating Instructions12Programme option buttonsThe programme option buttons are used to adapt the washing programme to suit the degree of soiling of
Operating Instructions13Consumption data and wash timesThe values given in the following table for selected programmes were calculated under standard
Operating Instructions14What does UPDATE mean?The control system of your machine is fully electronic. The software which determines this control syste
Operating Instructions15Before the first wash0 Run a washing cycle without washing (COTTONS 95, with half the amount of detergent).This removes any r
Operating Instructions16Washing Types and Care SymbolsThe care symbols help you choose the correct washing programme. Washing should be sorted accordi
Operating Instructions17Detergents and ConditionersWhich detergent and conditioner?Use only detergents and conditioners which are suitable for use in
Operating Instructions18Running a washing cycleBrief instructionsA washing cycle consists of the following steps:0 1. Set the correct washing programm
Operating Instructions19Setting the Washing Programme3 See "Programme tables" for a suitable programme, correct temperature and possible pro
2Dear Customer,Please read this instruction book carefully before using the appliance.Please ensure you fully understand the safety instructions on th
Operating Instructions20Changing the spin speed/Selecting Rinse Hold0 If necessary, change the spin speed for the final spin/select RINSE HOLD: Press
Operating Instructions21Opening and closing the door0 Open: Press the DOOR/LIGHT button. The door springs open.0 Close: Press the door firmly closed
Operating Instructions22Add detergent / conditioner 3 For instructions concerning detergent and conditioners, see "Detergents and conditioners&qu
Operating Instructions23Start the washing programme0 1. Check that the water tap is open.2. Start the washing programme: Press the START/PAUSE button.
Operating Instructions24Washing Programme ProgressProgramme progress displayPrior to the start, the programme steps chosen are displayed by the progra
Operating Instructions25Washing cycle complete/Removing the washingOnce the washing programme has come to an end, END illuminates on the programme pro
Operating Instructions26Programme tablesWashingNot all possible settings are listed below, only those which are useful and meaningful in everyday use.
Operating Instructions27Separate rinse/conditioning/starching Separate spin Type of washingMax. Load(dry weight)Programme selectorCottons/Linen 5kg ST
Operating Instructions28Maintenance and CleaningControl panelImportant! Do not use household furniture polish or abrasive cleaners to clean panel and
Operating Instructions297. Use a brush to clean the entire compartment area of the washing machine, particularly also the nozzles on the top side of t
3ContentsOperating Instructions . . . . . . . . . . . . . . . . . . . . . . . . . . . . . . . . . . . . 6Safety . . . . . . . . . . . . . . . . . . .
Operating Instructions30Cleaning the drain pumpPaper clips, nails and so on can sometimes get into the washing ma-chine with the washing and remain in
Operating Instructions31What to do if...Trouble ShootingIf the appliance is not working correctly, please carry out the following checks before contac
Operating Instructions32The washing machine vibrates during opera-tion or is unstable.The transport packaging has not been removed.Remove transport pa
Operating Instructions33The drain pump for the washing machine runs constantly - even when the appliance is switched off.The Aqua Control anti-flood s
Operating Instructions34If the washing results are not satisfactoryIf the washing turns greyish and limescale deposits are present in the drum• Insuff
Operating Instructions35Carrying out an emergency emptying• If the washing machine no longer pumps out the water, emergency emptying must be carried o
Operating Instructions36When the water is completely drained:6. Push the plug securely into the emergency emptying hose and turn it clockwise to secur
Operating Instructions37Additional Rinse (RINSE+)The washing machine is set for very economical water consumption. However, for persons who suffer fro
Operating Instructions38Water CoolingIt may be necessary to cool down the water before pumping it out in order to prevent thermal damage to the plasti
Operating Instructions39Programme protectionTo safeguard a programme setting against unwanted changes (e.g. pro-gramme selector turned, option buttons
4Programme tables . . . . . . . . . . . . . . . . . . . . . . . . . . . . . . . . . . . . . . . . . . . . . 26Washing . . . . . . . . . . . . . . .
Operating Instructions40Child Safety FeatureIf the child safety feature is set, the door cannot be closed and no washing programme can be started. Se
Installation and connection instructions41Installation and connection instructionsInstallation Safety Precautions• When moving do not tilt the washing
Installation and connection instructions42Installation of the applianceTransporting the appliance• Do not place the washing machine on its front or on
Installation and connection instructions433 The special spanner (A) and the caps (B) (2 each) and (C) (1 each) are supplied with it.3. Remove the scre
Installation and connection instructions44Installation-Site preparation• The installation surface must be clean, dry and level. Do not install on a de
Installation and connection instructions45Levelling the appliance3 Self adjusting foot: The rear foot of your washing machine is designed like a sprin
Installation and connection instructions46Electrical ConnectionAny electrical work required to install this appliance should be carried out by a quali
Installation and connection instructions471 WARNING! A cut off plug inserted into a 13 amp socket is a serious safety (shock) hazard. Ensure that the
Installation and connection instructions48Water connection3 The washing machine is provided with safety devices preventing back-contamination of the w
Installation and connection instructions49Inlet Hose ConnectionA pressure hose 1.5m in length is supplied.If a longer inflow hose is required, only a
5Electrical Connection . . . . . . . . . . . . . . . . . . . . . . . . . . . . . . . . . . . . . . . . . . 46Water connection . . . . . . . . . . .
Installation and connection instructions50Water DrainageThe appliance drain hose should hook into a standpipe, the hook in the drain hose is formed us
Installation and connection instructions51If you intend the drain hose from the washing machine to empty into a sink, make sure that the sink is empty
Installation and connection instructions52Technical data Dimensions (dimensions in mm)Height Adjustment approx. +10 / -5mmLoad (depending on theprogr
Warranty conditions53Warranty conditionsGreat BritainGuarantee ConditionsAEG offer the following guarantee to the first purchaser of this appliance.1.
Index54IndexAAqua Control . . . . . . . . . . . . . . . . . 14, 25, 33Automatic adjustment foot . . . . . . . . . .9, 45CChild safety feature . . . .
Service & Spare Parts55Service & Spare Partsvice & Spare PartsIf after carrying out the necessary checks there is still a fault with your
AEG Hausgeräte GmbHPostfach 1036D-90327 Nürnberghttp://www.aeg.hausgeraete.de© Copyright by AEG822 942 345-01-300402-12Subject to change without
Operating Instructions6Operating Instructions1 SafetyThe safety features of AEG electrical appliances comply with accepted technical standards and the
Operating Instructions7Child Safety• Packaging materials (e.g. films, styrofoam) can be dangerous for chil-dren. There is a risk of suffocation! Keep
Operating Instructions82 DisposalPackagingDispose of the packaging material correctly. All packaging materials used are environmentally friendly and c
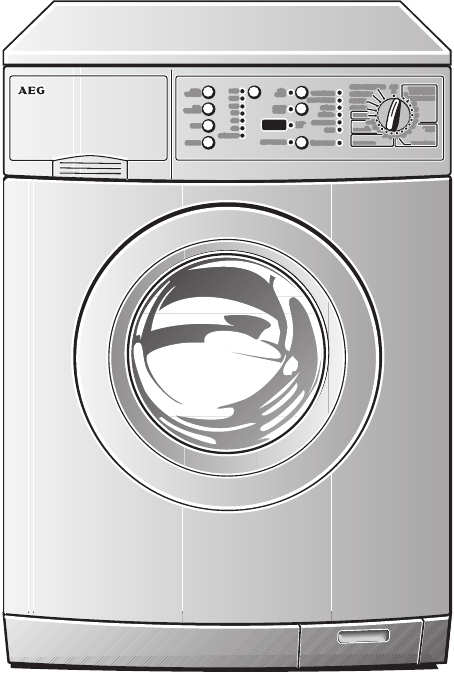
Operating Instructions9Description of the ApplianceFront view Detergent dispenser drawer Detergent dispenser drawerMain door Screw feet (height-ad
Related products and manuals for Washers Aeg LAVAMAT 88730
 (43 pages)
 (68 pages)
(60 pages)
(76 pages)
(28 pages)
(28 pages)
(76 pages)
(4 pages)
(68 pages)
(60 pages)
(76 pages)
(28 pages)
(28 pages)
(76 pages)
(4 pages)

 (64 pages)

 (76 pages)
(56 pages)
(68 pages)
(76 pages)
(56 pages)
(68 pages)
 (60 pages)
(76 pages)
(64 pages)
(36 pages)
(64 pages)
(2 pages)
(36 pages)
(2 pages)
(60 pages)
(76 pages)
(64 pages)
(36 pages)
(64 pages)
(2 pages)
(36 pages)
(2 pages)
© 2020, manymanuals.com. All rights reserved. | 0.084 s |
 Manymanuals.com
 Manymanuals.de
 Manymanuals.fr
 Manymanuals.it
 Manymanuals.pl
 Manymanuals.cz
 Manymanuals.es
 Manymanuals-pt.com
Comments to this Manuals